How to turn receipts into bookkeeping records
A practical workflow for converting receipt photos into clean expense records.
3 min read · Updated
In short
Turn a receipt into a bookkeeping record by photographing it the same day, assigning a category, checking the date, vendor, tax and total, and keeping it in a spreadsheet with date, vendor, category, tax, total and source-file columns. Ask an accountant whether an expense is deductible.
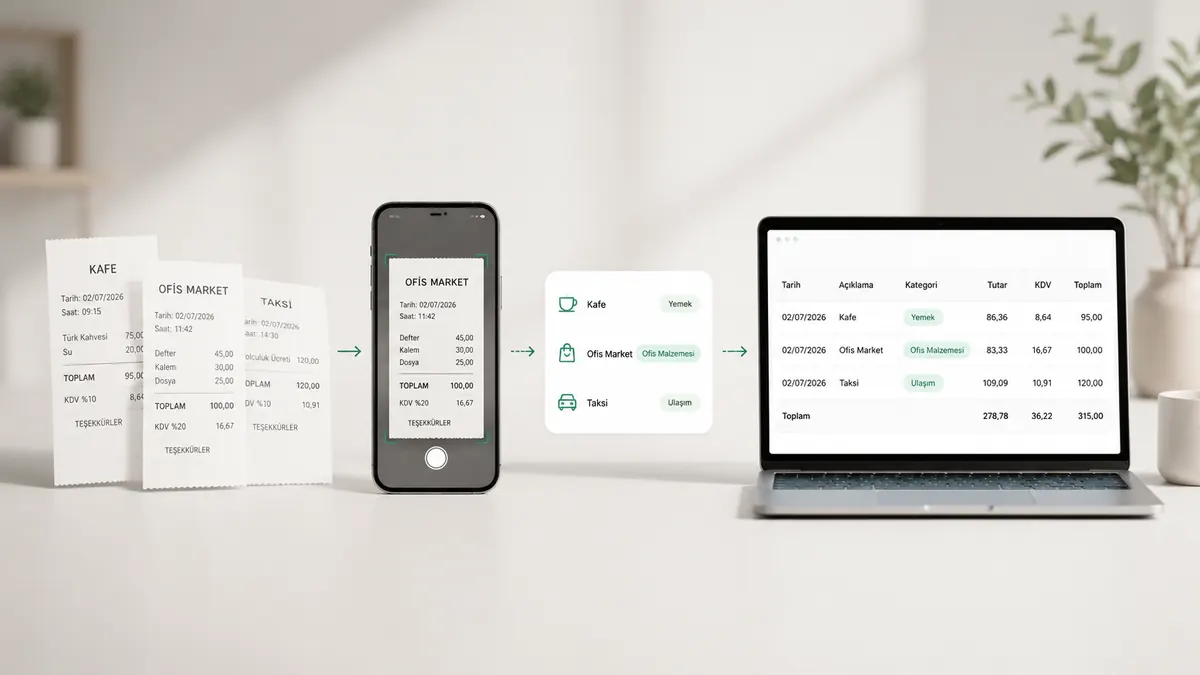
Turning a receipt into a bookkeeping record means more than keeping a photo. The record should explain when the purchase happened, who the vendor was, what the business purpose was, how much tax was included, and where the original document can be found.
Start by capturing the receipt as soon as possible. Thermal paper fades, and small totals or VAT lines may disappear after a few months. A useful photo shows the full receipt, avoids glare, and keeps the text straight enough for OCR.
Next, assign a category. Office supplies, travel, meals, postage, software subscriptions, and client-related costs are common examples. A clear category makes month-end review much faster and reduces back-and-forth with your accountant.
After OCR extraction, check the important fields: date, vendor, total, tax amount, currency, and payment method. Automation removes repetitive typing, but it should not replace judgement on large or unusual expenses. See the guide to fixing OCR errors to catch common mistakes.
A simple spreadsheet structure works well: date, vendor, category, tax rate, tax amount, total amount, currency, payment method, source file, and notes. The source file column is especially useful because it connects the spreadsheet row to the receipt image. If your accounting software expects its own column layout, hide, reorder and rename the columns in the results table before you download; the layout is remembered in your browser. For layout ideas, see examples for importing receipts into Excel.
This article is general information, not tax advice. Deductibility depends on your country, business type, and the nature of the purchase. Ask a qualified accountant when in doubt.