How It Works
ExpenSheet turns receipt and invoice photos into an editable Excel table in four steps.
From receipt to Excel in four steps
1. Upload a receipt or invoice
Drag and drop a JPG, PNG, or PDF, or pick a file. You can upload several documents at once; each is processed separately. High-resolution phone photos are automatically downscaled in the browser before upload, so uploads stay fast.
2. Automatic OCR reading
Documents are read with OCR (Optical Character Recognition), extracting fields such as date, vendor name, vendor tax ID, document number, tax rate, tax amount, net amount, total, payment method, and the last 4 digits of the payment card. If one photo holds several receipts, each becomes its own row. Extracted values go through a consistency check and the most reliable result is chosen.
3. Preview and correct the table
Extracted data becomes a table automatically. Unreadable or uncertain fields are flagged; you can click a cell to edit it — change an amount and the net, tax, and total check runs again. Double-click a row to view the original document, or, for photos holding several receipts, the cropped image of just that receipt. You can hide columns, reorder them, and rename their headers.
4. Download as Excel, CSV, or JSON
Download the table in one click. Excel (XLSX) is the default; CSV and JSON are also available. Column order and headers are preserved. Sign in and the Output Settings menu opens up: upload your own accounting template so the export is produced with exactly those column names in that order, and choose the CSV decimal and column separators.
Supported documents and formats
ExpenSheet works with the document types you use every day:
- JPG and PNG photos of receipts, invoices, or POS slips
- PDF receipts and invoices — text-based PDFs read more accurately than photo-based ones
- Up to 10 MB per file
- Turkish (KDV), English (VAT), and German (MwSt) receipt terminology
Example: from receipts to a table
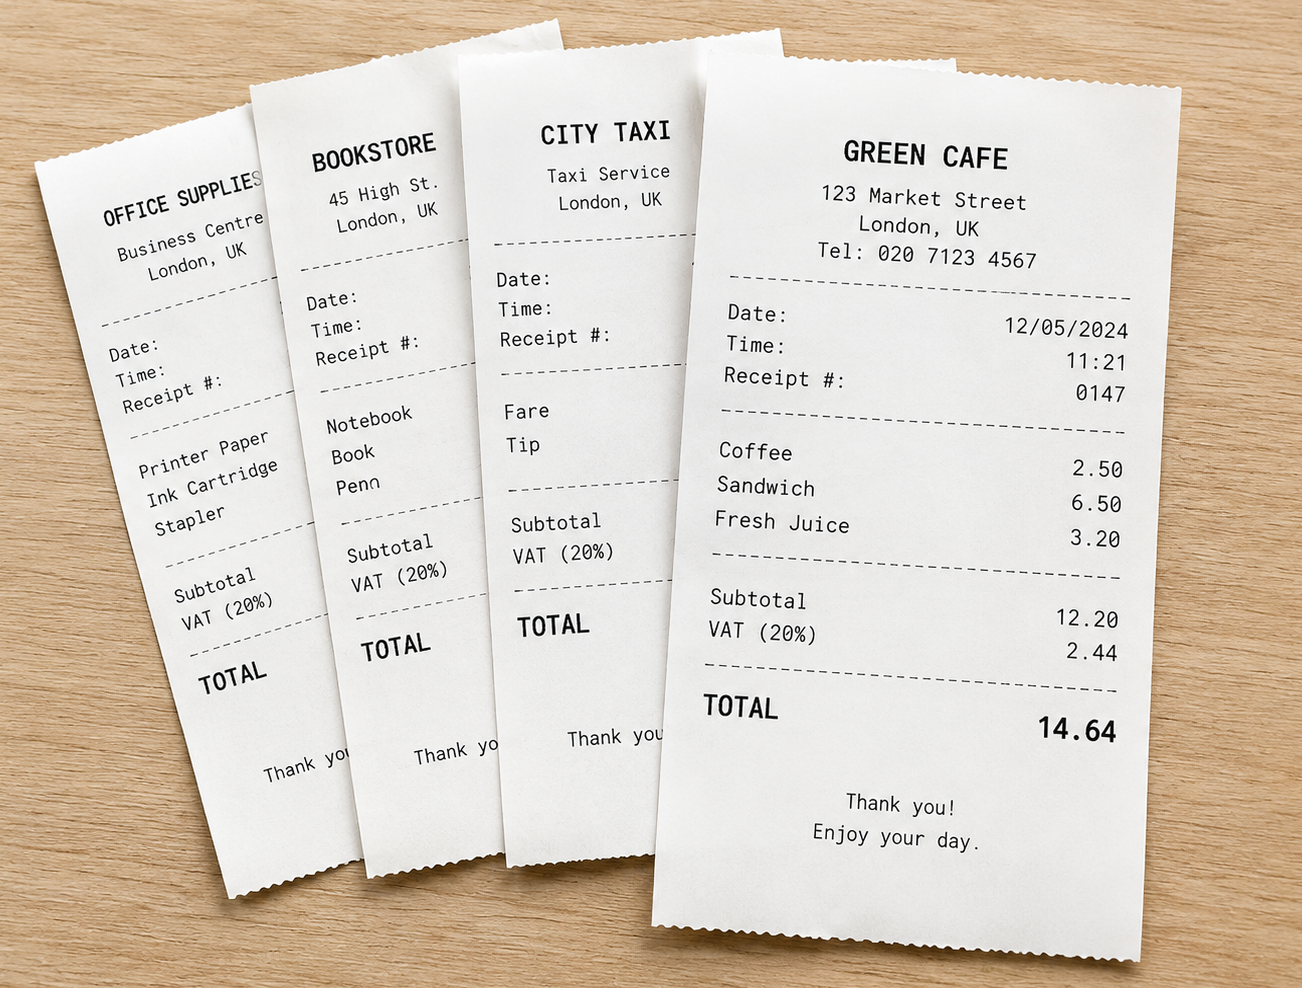
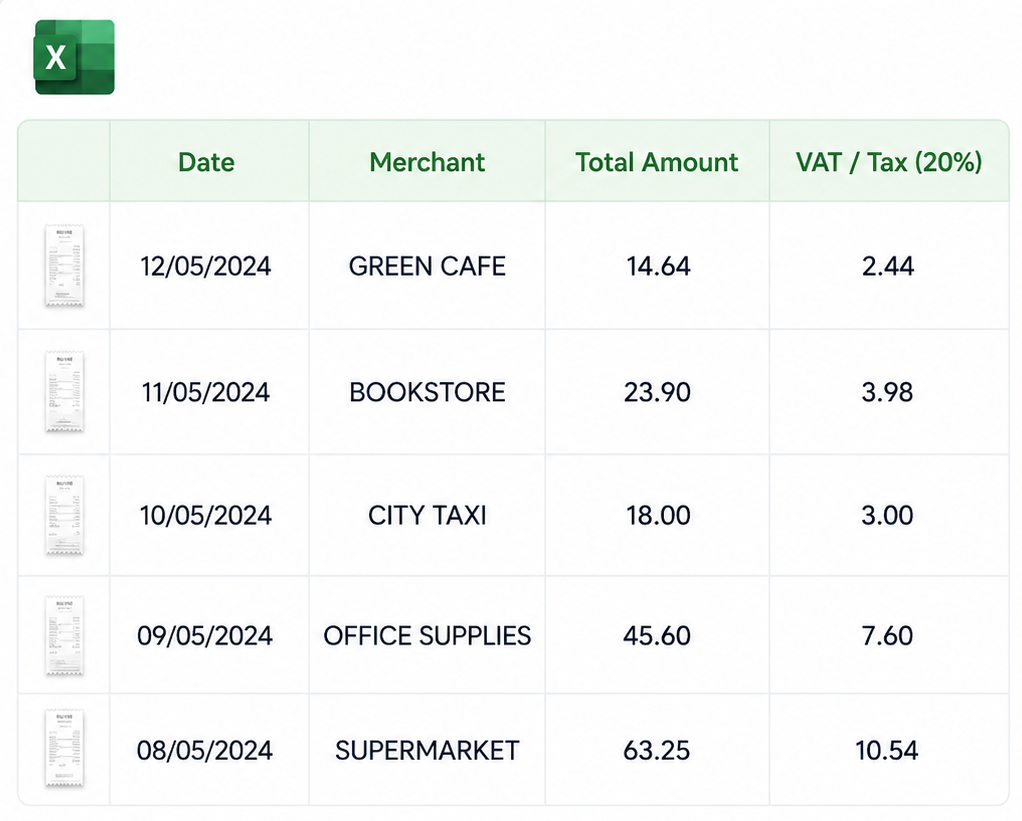
Below you can see how uploading several receipts together combines them into a single Excel table.
Tips for the most accurate result
- Place the receipt on a flat surface and keep all edges in frame.
- Reduce shadows and glare; use even lighting.
- Photograph thermal receipts before they fade, ideally the same day.
- For PDFs, use a text-based file when possible.
- Manually check extracted values on high-value documents.
Quick questions about the process
How many documents can I upload at once?
You can upload up to 10 files together. Each is processed separately and the results are combined into one table.
Which fields are extracted automatically?
Date, vendor name, vendor tax ID, document number, net amount, tax rate, tax amount, total, currency, payment method, and the last 4 digits of the payment card are targeted. On invoices the buyer name and tax ID are read as well.
What happens if one photo holds several receipts?
The photo is split automatically and each receipt gets its own row in the table. Double-click a row and you see the cropped image of just that receipt. When the receipts cannot be separated the row is flagged so you can check it.
Can I get the output in my accounting software's column layout?
Yes. Once signed in, upload your own template from Output Settings — give it the header row of the file you import into your accounting software, and the export is produced with exactly those column names in that order. Only the header row is read; the data in the template file is not stored.
Are my documents stored?
Receipt and invoice files are processed for conversion only and are not stored permanently. When you sign in, the only thing saved to your account is your output preferences: column layout, the column names you chose, and the headers of the accounting template you uploaded. See the privacy page for details.